Sunday, June 8, 2014

Learning How to Make a Yukata - Part Five: Starting the body

So I've purchased 6 meters of a printed cotton for making a yukata. Luckily I got it on sale for $5 a meter, but normally this stuff retails at $14.99 a meter (ouch!). For someone on a budget, maybe full price printed quilting cottons might not be the most economical decision.

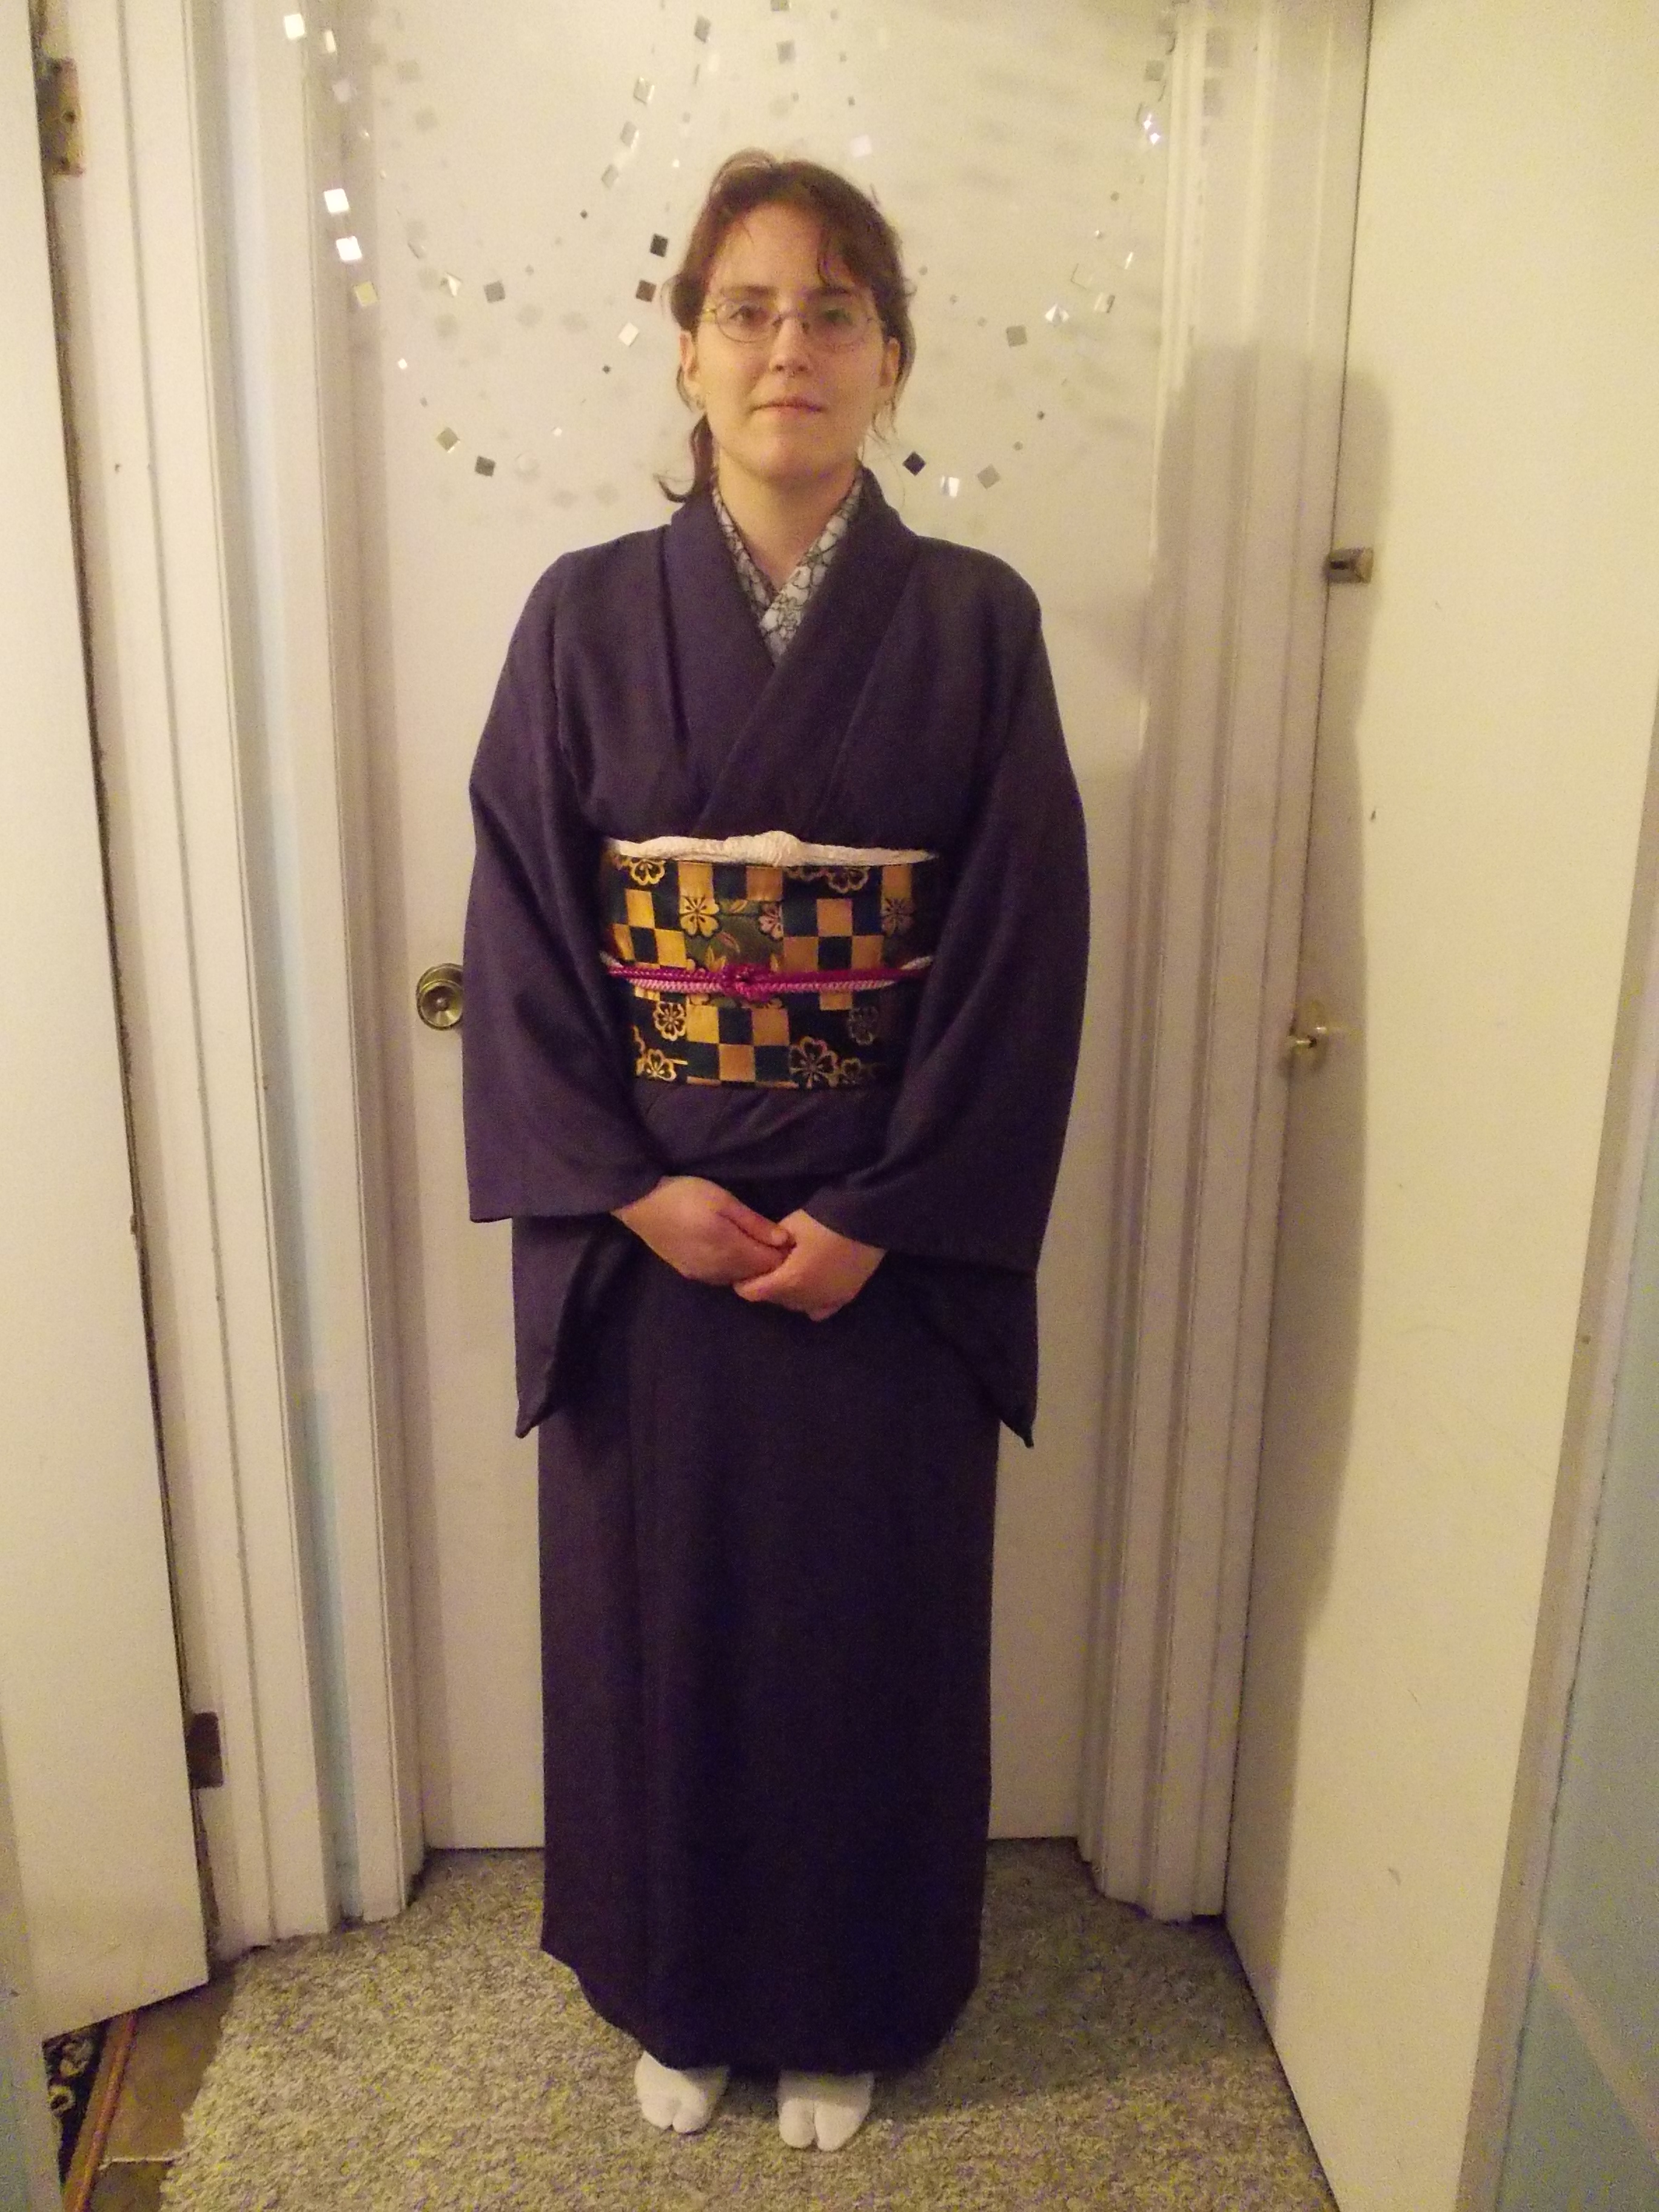
I was searching for a fireworks pattern, but this was the closest I could get to that I actually liked. I plan to wear this with a black obi in hopes that it will make the colours on the cotton "pop out" like fireworks (still don't have a black one yet!).

I'm sorry, the tape measure is a bit hard to read in the photo. It reads 53 cm wide (fabric folded in half.)

And now for the sewing instructions:

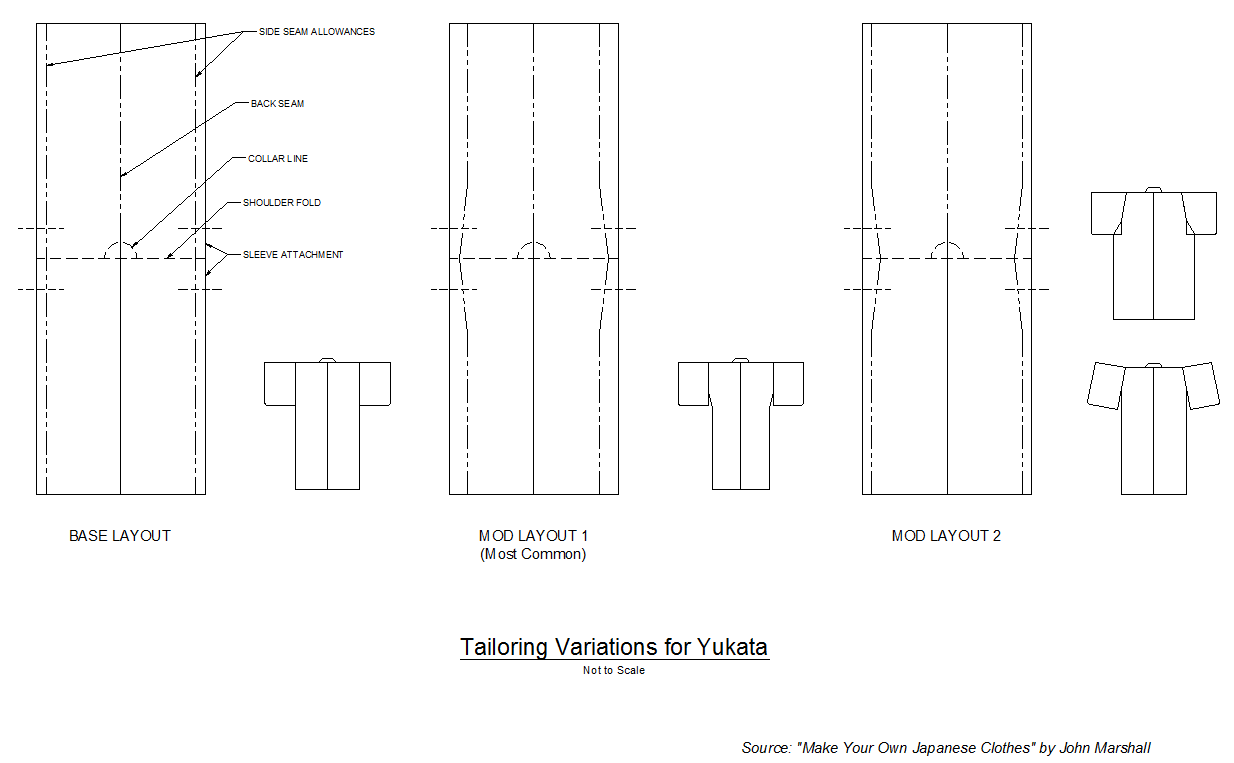
1. Cut out all the pieces for the yukata. Pay extra attention to making sure the pieces are cut straight and at right angels if using a Western width fabric.

2. Sew the back seam. This seam is usually done using a princess seam (aka French seam). 
First, place the two body panels wrong sides together (right/patterned side out). Then fold in half . The top of the fold is the shoulder line. Pin one side from hem to shoulder. Sew with a 1 centimeter seam allowance.
Next, unfold the fabric and spread the panels on an ironing board. First iron down the seam to one side. Then fold the panels, right side in, and iron the seam again.

Pin, and sew a 1.5 centimeter seam allowance. Iron seam flat.

3. Cut the neck line. At the shoulder line, cut a 9.5 cm line from both sides of the center seam (making 19 cm in total)
(Photo showing cut neck line and back seam on wrong side of fabric)

3. Make the back horizontal seam.

If you have ever looked at the back horizontal seam closely, you would notice that it's a false seam. There is no actual cut there.

This is called a kurikoshi-age (くりこしあげ). After the incision for the neck is made, the tuck on the back pulls the cut down and repositions the shoulder line. The gap between the cut and the back of the neck creates the popped collar look seem on women's kimono.


This tuck is sew down far enough on the back so it can be hidden behind the obi when tied. 

The tuck helps great the gap without having to cut extra fabric out of the panels. In the past, re-purposing fabric was very important in Japan, thus minimal cuts were made. Now-a-days, I doubt yukata would ever go through any type of repurposing. If you wanted to, you can simply measure down the back where the incision should be and cut it without creating the false tuck, and it wouldn't look any different when worn. 

But to make this seam anyways, layout the panels shown below and make a fold 43 centimeters from the collar line.


Sew with a 2 cm seam allowance. Flatten out panels on an ironing board and iron down the seams.

(Ironed back seams)

Then, fold the body panels in half long wise and iron the shoulders to make a new should line.

(New shoulder seam with lowered neck line)

-------------------------------------

Next will be attaching okumi panels. Stay tuned for part six.

Tuesday, April 29, 2014

Learning How to Make a Yukata - Part Four: Tailoring

Upon first glance, it looks like the yukata is just sewn straight up and down through and through. And if you did that, probably only a small select elite few would be able to notice. However, interpreting Japanese DIY yukata patterns show subtle alterations. While one style of alternations is very obviously the most popular, I've come across a couple of different ones. I just want to draw attention to these before getting starting on the tutorial so the sewing instructions make a little more sense (they were hella confusing when I started out). I'm going to go out on a limb here and say that these tailoring techniques were probably developed in order to make the garment fit a human body a bit nicer without having to cut away or add extra fabric.

Below is a diagram that illustrates the various tailoring techniques I've come across. I'm sorry the preview below is pretty crappy so you can look at the full size here.


Mod Layout 1 is the popular one I mentioned above. I speculate that the tapering at the waist is to help reduce fabric bulk under the obi

However, if you are like me, and have the pear shaped body with a huge desk-job ass, having it narrower at the waist ultimately makes the whole thing look too small because it doesn't wrap around enough. Bah!! Time to lay off the ice-capps.

Mod Layout 2 looks more suitable for someone with a large belly.

I wish I knew the history surrounding these tailoring techniques but I haven't come across it yet in my research. Around what time did this become the standard way of doing things? I'll try to find out later.

But anyways, another technique to mention is in how the okumi extension panels are sewn on. Generally, one would assumed they are sew on straight up and down the length of the garment, but some yukata patterns show a slight curve near the top. By curve I mean the seam between the okumi and body panels starts to angle towards the shoulder after where the seam comes out from behind the obi (you catch that?). I believe this is only done on female yukata because this is claimed to balance the curviness of the female bust. It's so subtle that it's barely noticeable. I point an arrow to it in the picture below. Can you see it?

(Photo from Ichiroya.com)

This is a diagram of an okumi panel with the seams marked out. The red arrow points to the seam that attaches to the body. I've circles the differences in seam allowance between the top and bottom.

But anyways, now that we have some context established, I'll be moving on to the sewing tutorials. Stay turned for part 5!

Tuesday, April 15, 2014

Learning How to Make a Yukata - Part Three: Mens and Womens Differences

When it comes to sewing a yukata, there are three differences between a yukata for a man and for a woman.


Men's Yukata

Woman's Yukata
(Photos from Yukata Kimono Market.) 

Patterns and Colours
  • Women's patterns are often bright and consist of large floral or nature motifs. They can come in any colour but traditionally were mostly deep indigo. However, women tend to wear more subdued colours when they get older. 
  • Men's patterns often use stripes or subtle patterns, with usually subdued blacks, blues or greens. Sometimes prints include dragons, animals, or theatre motifs.
Length
  • It is customary for woman to wear ohashori (the fold seen underneath the obi) therefore women's yukata come longer than average woman's height in order to make the fold.
  • Since an ohashori on men's yukata is not used, the length is simply the height of the wearer.
 Sleeves
  • Since woman's obi are wider, they have "cut" away the sleeves from the body. Slightly more than half the length of the sleeve is left unattached. The edge is left open.
  • A man's sleeve is mostly attached to the body, leaving only a small flap. Often this flap is sewn closed.


Sorry, the measurements on the mens's sleeve is really hard to read on the dark picture above. It's 10 cm for the overhang and 37 cm for the attachment.

(Just a note: I don't have any research on children's yukata at this time. I will be leaving those out of the tutorial... for now.)

Stay tuned for part four; alterations!

Thursday, April 3, 2014

Learning how to Make a Yukata - Part One: The Bolt

浴衣の作り方
Yukata no tsukurikata (How to Make a Yukata)

When I first tried researching how to make a yukata, not only was it difficult to find them in English, but I could barely make heads or tails of the ones I did find. I've also seen this same frustration get echoed in online kimono forums from time to time. After several years of casual research and digesting bits and pieces of history and information on kimono, I've been able to produce one.


So now I'm going to write my sewing tutorial in a unique way. Instead of making it simply a sewing tutorial, I am making it descriptive with historical references and context. This will make it quite long and wordy, but bare with me. I believe that if you understand how the kimono "works", sewing instructions for it will be considerably easier to follow, at least that's how it worked for me. :)


浴衣の反物
Yukata no Tanmono (Yukata Fabric)


Yukata  浴衣 ["yu" (bath) + "katabira" (under clothing)], are constructed from long, thin bolts (called "tanmomo" 反物 or "boruto" ボルト) that are a standard size, usually around 36 cm's wide (14 to 15 inches) and 1200 cm long (472.5 inches). It is usually constructed of cotton and the print, which is usually hand dyed, shows on both sides.
Image from Ichiroya
The size of the yukata, particularly the width, is restricted to the width of the bolt. This width has been standardized in Japan for a few hundred years now, originating in the Edo Period around 1603 AD. All yukata, kimono, and haori construction is based on it. The images below illustrate basic kimono construction.


The basic design of the kimono was influenced by several historical factors. One of them was the need to conserve as much fabric as much as possible. Traditional construction methods consists of the absolute minimal amount of cuts possible to the fabric. This optimized its usability in several ways. For example, the traditional means of washing a kimono was to take out all of its stitching and baste it back into a mock bolt.
 
 Old photo showing Araihari 洗い張り; taking apart a kimono and washing it in a bolt.

Putting it back together was easy and the seams could be adjusted if the wearer had grown. The same could be done if the garment was passed to another person. Panels could be replaced if a section had worn out. When the garment was no longer suitable for wearing, it could be made into a work jacket or a futon cover.

Another factor is the width of the bolt that I mentioned above. As you can see in the image below,  how the loom was used to weave cloth (being tied to the waist) impacted the width.


Stay tuned for part 2, which will be about how to layout the panels on a fabric.

--------------------------------------

Here is one of my references, a page called "How to make a Yukata".

Wednesday, April 2, 2014

Kiri Mon

桐紋
So someone on the ImmortalGeisha forums said this:
五三桐 (Go san kiri)
"Its [the kirimon depicted above] a mon that anyone can use ^^ It is not specifically related to a family but free-to-use so to say ^^  (Source)"
Interesting. This is what Wikipedia says about it:
The Government Seal of Japan, also called the Paulownia Seal (桐紋 kirimon?) or Paulownia Flower Seal (桐花紋 tōkamon?), is a mon or a crest used by the Cabinet of Japan and the Government of Japan on official documents. One version is used as the official emblem of the office of the Prime Minister of Japan. It resembles a stylized paulownia flower with 5-7-5 leaves. It was the crest of the Toyotomi clan.
The go-shichi no kiri (literally in English Paulownia of 5-7), as it is alternatively called, represents the democratically elected representatives of the government as a contrast to the chrysanthemum of the Imperial Seal of Japan, which represents the Emperor of Japan, who is the symbol of the sovereignty of the state.

Again, from ImmortalGeisha Wiki:


Here is another description that I found on the net (from here).


Okay, so I've read it a few times. I wonder why the wikipedia page doesn't mention the "every man" use of it? I would like to find an academic source to confirm it (doing that in English will probably be a problem though. If anyone reading this happens to know one, please comment!)

Looking through Ichiroya certainly confirms this observation. A large part of their kurotomesode have the kiri mon on them, just like the one pictured below:


(Tehehe, hmmmm... my sister just moved into a new place with her boyfriend recently and my brother has a newgirlfriend..... Time to buy a  kurotomesode with a kirimon!!!! OMG OMG OMG THIS ONE WOULD MATCH MY OBI ~SQUEEEEEEEEEEEE~ )


Friday, March 28, 2014

How to Wear Your Zouri


草履
Zouri
Post I found on ImmortalGeisha....

OK, don't ask me why I noticed. And you can just slap me if you want. But I noticed that your zori are being worn Western style. 
The toe thong [thong straps called hanao 鼻緒] should be more forward in the space between the two toes. Most people push it all the way back and is probably why so many find them soooo uncomfortable and tight. 


(User Chiisana Hato)

That's nice eh? The Japanese have footwear that is intentionally worn to have your feet hang over the edge. I wonder how that came to be?

Wikipedia says:
Like all Japanese sandals, zōri (草履) allow for free circulation of air around the feet, a feature that probably came about because of the humid climate that predominates throughout most of Japan. They are easily slipped on and off, which is important in a culture where shoes are constantly removed and put back on, and where tying shoelaces would be impractical in a tight kimono.

My guess is that it just became normal to not slip the whole sandal onto your feet. 

A bunch of people in the forum went on to say "but my feet hang over the edge too much, even more than normal Japanese hang over the edge amount!" I guess that is a common problem for larger non-Asian kimono enthusiasts. Thankfully Rakuten carries a large selection of them. Size "large" is about 23 cm long (shown below). That's enough for someone who is size 8, like me! (They carry zori up to 27 cm long, wow.)


And then there are these! Little rain covers for your toesies!


And I reeeeeeeeeeeeeeeeeeeeeeeeeeally want something like these;


And lastly, an interesting little tid-bit; the modern day flip-flop came directly from zouri being brought back by solders to the US after World War 2. (Maybe this is obvious to some people but before learning this I just thought that the footwear were similar simply because of coincidence).

Thursday, March 27, 2014

Tabanenoshi Motif

I bought this beautiful fukuro obi from a used Japanese gifts sale.

Judging by the pink and white colours, I thought that this was specifically for a wedding furisode (but I bought it anyways cause its perrrdyy). I had also seen the tied paper motif on a wedding uchikake listed on Ichiroya a couple days earlier.

To find out if it was specifically a wedding obi, I looked up the motif. It's called tabane noshi.

 束ね熨斗
(tabanenoshi, lit=" bundle of strips")

ImmortalGeisha.com writes:
Tabane noshi were originally bundles of abalone used as religious offerings. Nowadays, paper representations of them are used as decorations during festivals or attached to gifts. Due to these associations tabane noshi is an auspicious motif.

Noshi also sounds like the Japanese word for '"expand" or "progress"... [and so] came to be an auspicious symbol of the continuation of the family line.'
[1] Tabane noshi are a common motif in semori, "back protectors," charms embroidered onto the back of children's garments that lack a center seam to repel evil influences. [2]
Tabane noshi has no season in of itself. The strips of noshi usually contain other motifs, both geometric and floral. The motifs used are often also auspicious motifs like kiku or tsuru.

Although it doesn't say if it's specifically for weddings, a quick search on Ichiroya shows the motif on mostly wedding related items, like kurotomesode, metallic fukuro obis and bridal furisode kimonos, such as the one shown below.


Below shows a furisode with tabanenoshi dating back to the Edo Period (18th Century). This is from the Kyoto National Museum.


A tabane noshi kamon (Source).
 
 
-------------------------------------------------------------------------

I'll probably wear my obi to a wedding if I'm invited to one, but I think I'll be too self-conscious to wear it to anything else.

Wednesday, March 26, 2014

Kimono Dressing Class Photo


Here is the photo from my last kimono dressing class. OMG every one is so cute!! Sensei is the one in the blue kimono.

The komon kimono I'm wearing was purchased from Ichiroya. I don't really like the colours but it happened to be relatively cheap and, most importantly, bigger than usual. Even then, it still just barely fits me. (Why I am so infatuated with a garment that isn't supposed to fit me still baffles me.)

Monday, March 24, 2014

Iromuji Kimonos

Interesting post about Iromuji on the Ichiroya blog.

For example, something I didn't know:
"...a kimono with dyed mon in the back is more formal than iromuji with sewn mon. Dyed mon is more formal in general."

I recently purchased a custom iromuji from KimonoPoncho. It's a nice, deep purple, my favorite colour. It's huge! Just like I wanted, so now I have a kimono that actually fits me. But this means now I need to make an equivalent sized juban for it. I have a picture of it below but the lighting absolutely brutalized the colours.

 
If you happen to have a very un-Japanese sized body and are looking for a custom made kimono, I recommend you order from KimonoPoncho. Be prepared to pay $200 to $300 for it though (which, considering how expensive new custom kimonos are, is pretty standard).